Mutter Paneer - Matar Paneer - Paneer Peas Masala Recipe

Mutter Paneer Recipe - Matar Paneer - Paneer Peas Masala Recipe:

Mutter Paneer is now the family's favorite recipe. The main ingredients are Paneer and Peas. The recipe of Paneer Mutter masala is quite easy. I always get scolded by my sister whenever making paneer recipes for doing it in normal quantity. Paneer butter masala and Paneer mutter masala gets over very quickly. The last one to eat will get only very little gravy. Last time when I made mutter paneer, I did not get a chance to take photographs. Yesterday I made this for dinner and I was able to capture pictures this time. Try this Paneer mutter masala for your dinner and get appreciations.


Mutter Paneer - Matar Paneer - Paneer Peas Masala Recipe:


Mutter Paneer Recipe
Paneer Mutter Masala


Mutter Paneer - Matar Paneer - Paneer Peas Masala Recipe:


Mutter Paneer - Matar Paneer - Paneer Peas Masala


Prep Time: 10 mins  |    Cook Time: 20 mins    |    Serves: 2-3
Recipe Category : Side dish for chapathi, roti, phulka and rice


Ingredients:

  • Paneer - 10-15 cubes
  • Peas - 50-75g(Frozen or soaked overnight and cooked peas)
  • Coriander powder - 1/2 tsp
  • Red Chilli powder - 1 tsp
  • Garam Masala Powder - 1 tsp
  • Turmeric Powder - 1/8 tsp
  • Salt - As required
  • Milk/Fresh cream - 3 tbsp
  • Water - As required
  • Oil- 2 tbsp
  • Crushed Kasthuri Methi - 1 tsp(optional
  • Coriander leaves - To garnish(optional

  • To Roast and Grind

  • Big Onion - 2 finely chopped
  • Tomatoes - 2 big size or 3 medium size
  • Ginger Garlic paste - 1 tsp or Ginger - 1 inch piece and Garlic - 3 flakes
  • Cumin seeds - 1 tsp
  • Cinnamon stick - 1/2 inch
  • Cloves - 1
  • Green Chilli - 1

Read more ...

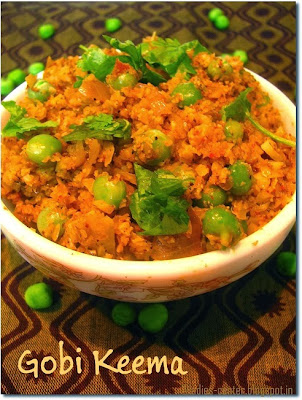
Gobi Keema Recipe - Cauliflower Recipes - Gobi Recipes

Cauliflower Recipes - Gobi Recipes - Gobi Keema Recipe:


Gobi Kheema is one of the cauliflower recipes I have recently tried. I would not say it tastes better than my favorite Gobi Manchurian Recipe. But it is surely a tasty cauliflower recipe. When you want a break from regular gobi recipes, you can opt for Gobi Keema. Also, it is low calorie recipe when compared to the other gobi recipes. If you are a lover of spicy gravies, you might not like this recipe. Since this cauliflower recipe is not a spicy recipe. It tastes best when you have it as side dish for chapathi/rotiphulka or curd rice. You can pick this cauliflower recipe when you have less time or when you want a light gobi side dish. Okay. Let us see the Gobi Keema Recipe.

Cauliflower Recipes - Gobi Recipes - Gobi Keema Recipe:


Gobi Keema Recipe
Gobi Keema


Cauliflower Recipes - Gobi Recipes - Gobi Keema Recipe:


Cauliflower recipes - Gobi Recipes - Gobi Keema 


Prep Time: 5 mins  |    Cook Time: 15 mins    |    Serves: 2-3
Recipe Category : Side dish for chapathi, roti, phulka


Ingredients:

  • Cauliflower - 1 Medium size
  • Peas - 50g(Frozen or soaked and cooked peas)
  • Big Onion - 1 finely chopped
  • Tomatoes - 2 
  • Ginger Garlic paste - 1 tsp
  • Coriander powder - 1 tsp
  • Red Chilli powder - 1 tsp
  • Cumin seeds powder - 1/2 tsp
  • Garam Masala Powder - 1 tsp
  • Salt - As required
  • Water - As required
  • Oil- 2 tbsp
  • Coriander leaves - To garnish(optional)


Read more ...

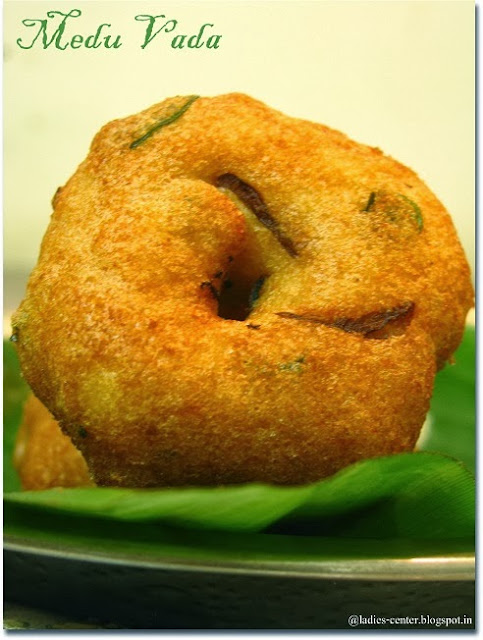
Medu Vada Recipe - How To Make Medhu Vada(Ulunthu or Ulundu Vadai Recipe)

Medu Vada Recipe - How To Make Medhu Vada(Ulunthu or Ulundu Vadai Recipe):


Medu Vada is a popular South Indian vadai. Among all the Vadai vareities, Medu vada Or Urad dal vada is the most preferred vadai especially in Tamil Nadu. We call it as Ulunthu Vadai. We usually make this with Urad Dal. Even we can give this to 1 year old baby. But we have to give in small quantity. In some families, Ulunthu Vadai is prepared as dinner itself. Plain coconut chutney is the best accompaniment for Medu vada. But it is not must since the vadai also tastes great without any side dishes. Medu vada is a great tea time snack and you can prepare it for your guests to delight them.

Medu vada is also one of the topmost festival recipes. It takes place in every home on the day of Diwali. You can omit onions if you want. Ulunthu vadai is a healthy recipe with the richness of Urad dal. I have already explained the health benefits of Urad dal in my post 'Ulunthamparuppu sadham(Urad dal rice)'.


Medu Vada Recipe - How To Make Medhu Vada(Ulunthu or Ulundu Vadai Recipe):


Medu Vada - How To Make Medu Vadai
Medu Vada


Medu Vada Recipe - How To Make Medhu Vada(Ulunthu or Ulundu Vadai Recipe):


Medu Vada Recipe - How To Make Medhu Vada(Ulunthu or Ulundu Vadai Recipe)


Prep Time: 5 mins    and 2 hours soaking time  |    Cook Time: 15 mins    |    Makes: 10 - 12 vadai
Recipe Category : Snacks


Ingredients:

  • Small onions - handful or 1 big onion finely chopped 
  • Pepper powder - 1/4 tsp(Optional - If you have whole pepper, grind it along with the urad dal)
  • Green chillies - 1-2 according to your taste
  • Curry Leaves - Few
  • Hing - A small pinch

  • To Make the Medu Vada batter:

  • Urad dal/Ulutham paruppu(no skin variety)  - 100 g
  • Corn flour - 2 tsp(optional but must for soft vadai)
  • Salt - As required

Read more ...

Carrot Chutney Recipe - Easy Chutney Recipe for Idli and Dosa(Gajar Recipes)

Carrot Chutney Recipe - Easy Chutney Recipe for Idli and Dosa(Gajar Recipes):


Carrot Chutney is another easy chutney recipe. Since we add carrot to the chutney, it will be not spicy. So, it will be definitely liked by kids. Carrot chutney is a great way to add vegetable if you have missed to give vegetable during lunch. Carrot chutney recipe which I have given here is less spicy. You can add more red chillies and make the chutney according to your taste. You can serve carrot chutney as a side dish for roti too. Let us see how to make carrot chutney here.

Carrot Chutney Recipe - Easy Chutney Recipe for Idli and Dosa:


Carrot Chutney Recipe - Easy Chutney Recipe for Idli and Dosa:


Carrot Chutney


Prep Time: 5 mins    |    Cook Time: 3 mins    |    Serves: 2
Recipe Category : Side dish for idli and dosa


Ingredients:

  • Grated carrot  - 100 g
  • Grated Coconut - 100 g
  • Red chillies - 3 - 5
  • Tamarind - A peanut size
  • Salt - As required
  • Urad dal - 1.25 tbsp

  • To Temper:

  • Oil(Sesame oil tastes good) - 2 tsp
  • Mustard seeds - 1 tsp
  • Urad dal - 1 tsp
  • Small Onion shallots - 5 chopped finely(optional)
  • Curry Leaves - few


Read more ...

Chana Dal Chutney Recipe for Idli and Dosa

Chana Dal Chutney Recipe for Idli and Dosa:


Chana Dal chutney is a different chutney recipe for Idli and Dosa. When you want a break from regular chutney recipes, Chana dal chutney recipe can help you. Chana dal is low in fat and helps to reduce cholesterol. Since it has low glycemic index, it is good for people having diabetes. It is a good source of fiber, calcium, zinc and protein. Chana dal is called as Kadalai paruppu in Tamil. In this recipe, I am using split variety(split chikpeas, bengal gram). Chana dal chutney tends to become more thick. So add necessary water before serving.

Check out 15 different yummy, quick and easy chutney recipes in the following link - Chutney recipes

Chana Dal Chutney Recipe for Idli and Dosa:


Chana Dal Chutney Recipe for Idli and Dosa:


Chana Dal Chutney


Prep Time: 5 mins    |    Cook Time: 3 mins    |    Serves: 2
Recipe Category : Side dish for idli and dosa


Ingredients:

  • Chana Dal/Kadalai Paruppu - 2 tbsp
  • Grated Coconut - 100g
  • Red chillies - 3
  • Tamarind - A peanut size
  • Salt - As required
  • Coriander Leaves(optional) - To garnish

  • To Temper:

  • Oil(Sesame oil tastes good) - 2 tsp
  • Mustard seeds - 1 tsp
  • Urad dal - 1/2 tsp
  • Small Onion shallots - 5 chopped finely
  • Curry Leaves - few


Read more ...

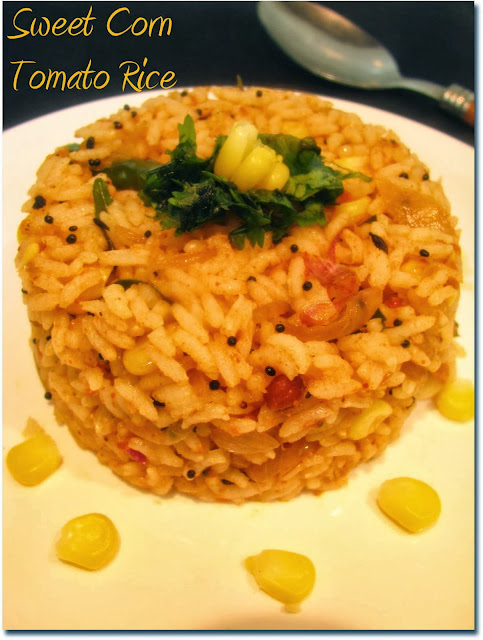
Sweet Corn Rice Recipes - Sweet Corn Tomato Rice Bath Recipe

Sweet Corn Rice Recipes - Sweet Corn Tomato Rice Bath Recipe:


Sweet Corn Tomato Rice Bath is a simple, tasty and healthy variety rice recipe. I love sweet corn very much. My kid also loves it. But he will not be able to eat more than half. One fine evening, I finished up my corn. When there is half a corn left over by my sweet kid, I was thinking about trying new recipe for the dinner with it. I did not have idli dosa batter also on that day. So, I planned to do rice with sweet corn. That is how I tried sweet corn tomato bath recipe. Some people might not like to have plain tomato rice. Even those people will love this sweet corn tomato bhath rice. It is a perfect lunch box recipe too.

Sweet Corn Rice Recipes - Sweet Corn Tomato Rice Bath Recipe:


sweet corn tomato rice bath recipe
Sweet Corn Tomato Rice Bath


Sweet Corn Recipes - Sweet Corn Tomato Rice Bath Recipe:


Sweet Corn Recipes - Sweet Corn Tomato Rice Bath Recipe - Tamil Variety Rice Recipes

Prep Time: 15 mins    |  Cook time: 20  Mins    |  Serves: 2
Recipe Category : Lunch|Main course


Ingredients:

  • Cooked Rice - 200g
  • Boiled Sweet corn kernels - 75-100 g
  • Big Onion - 1 medium size finely chopped
  • Tomato - 1 large  finely chopped
  • Green Chilli - 2 small slit
  • Garlic - 5 small crushed
  • Turmeric powder - 1/8 tsp
  • Kashmiri Chilli powder/Red Chilli powder - 3/4 - 1 tsp
  • Garam Masala Powder - 1/4 - 1/2 tsp
  • Salt - As required
  • Coriander leaves - 1 tbsp(optional)

  • To Temper

  • Mustard seeds - 3/4 tsp
  • Urad dal- 1/4 tsp
  • Cumin seeds - 1 tsp
  • Chana Dal/Kadalai paruppu - 1 tsp
  • Hing- A pinch
  • Curry leaves- few
  • Oil - 2 tsp


Read more ...

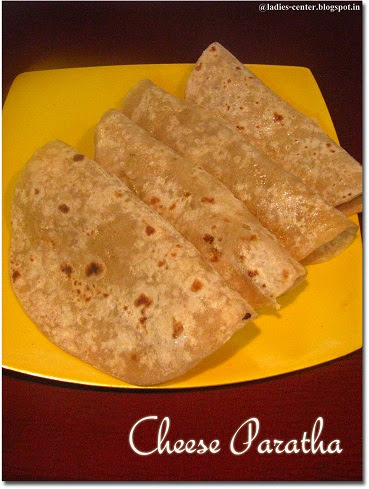
Cheese Paratha Recipe - How To Make Cheese Paratha For Kids

Cheese Paratha Recipe - How To Make Cheese Paratha For Kids:


Cheese paratha is the one which I wanted to try long time before. It is a very easy recipe and it will definitely please the kids who love cheese. I prepare cheese paratha for my kid when I prepare some other spicy parathas for me and my hubby. You can adjust the cheese quantity according to your preference. Calorie conscious people may think twice before having cheese paratha. But eating one or two cheese paratha once in a while should not harm you much:-) I liked Cheese paratha more than my kid. Ok. Let us see how to make cheese paratha. It is a great lunchbox recipe too for your kids.


Cheese Paratha Recipe - How To Make Cheese Paratha For Kids:


Cheese Paratha Recipe
Cheese Paratha


Cheese Paratha Recipe - How To Make Cheese Paratha For Kids:


Cheese Paratha Recipe - How to make Cheese Paratha

Prep Time: 30 mins    |  Cook time: 30 Mins    |  Makes: 4 - 5
Easy Cheese Paratha Recipe - Kids Recipes

Ingredients:


  • Wheat Flour - 200g
  • Cheese - As required(I used 1 tbsp of grated Milky mist cheddar cheese for each paratha)
  • Salt - As required
  • Water - As required
  • Oil - 1 tsp 

Other Ingredients:
  • Wheat Flour - for rolling
  • Oil- for cooking

Read more ...

Arisi Paruppu Sadam - Dal Rice Recipe - Tamil Variety Rice Recipes

Arisi Paruppu Sadam - Dal Rice Recipe - Tamil Variety Rice Recipes::

Arisiparuppu sadham was introduced to me by my friend Priya. She is basically from Coimbatore. In Tirunelveli, Thuvaramparuppu sadham(Toor Dal Rice) is famous. The main ingredients of both of the rices are same. Those are toor dal and rice. But the recipes are different. We add ground paste and coconut to the Toor dal rice. I prefer thuvaramparuppu sadham for lunch and arisiparuppu sadham for dinner. The former is more spicy version of Arisi paruppu sadham. If you are in a hurry, you should go for arisi paruppu sadham. It tastes so good. Papad and curd are best accompaniments for arisi paruppu sadham.


Arisi Paruppu Sadam - Dal Rice Recipe - Tamil Variety Rice Recipes:


dal rice recipe
Arisi Paruppu Sadam


Arisi Paruppu Sadam - Dal Rice Recipe - Tamil Variety Rice Recipes:


Arisi Paruppu Sadam - Dal Rice Recipe - Tamil Variety Rice Recipes

Prep Time: 15 mins    |  Cook time: 20  Mins    |  Serves: 2
Recipe Category : Lunch|Main course


Ingredients:

  • Rice - 200g
  • Toor dal - 75g
  • Big Onion - 1 finely chopped
  • Tomato - 2 small finely chopped
  • Green Chilli - 2 small slit
  • Water - 600ml
  • Salt - As required
  • Turmeric powder - 1/4 tsp
  • Coriander leaves - 1 tbsp(optional)
  • Ghee - 2.5 tsp
  • Sambar powder - 1/8 tsp(optional)

  • To Temper

  • Mustard seeds - 3/4 tsp
  • Urad dal- 1/4 tsp
  • Cumin seeds - 1 tsp
  • Hing- A pinch
  • Garlic - 3 small crushed
  • Curry leaves- few
  • Red chillies- 2(broken)
  • Oil - 2 tsp

Read more ...

Olive Oil and Sugar for face - Homemade Face scrub

Homemade Face scrub - Olive Oil & Sugar for face:


Hello friends,

I am going to introduce another moisturizing and exfoliating homemade scrub for face to you all. Guess what? It is Olive oil and Sugar scrub. Hope many of you might have olive oil in stock to take care of your skin. No need to mention about sugar. If you have only raw sugar, just put it in your mixer to get granulated sugar. Raw sugar will damage your skin. You can use this homemade face scrub for your whole body especially your knees and elbows. I have already posted on how to make exfoliating face scrub with rice powder and curd.

Homemade Face scrub - Olive Oil & Sugar for face:


Homemade Face scrub - Olive Oil & Sugar for face:


Ingredients:


Olive oil - 1 part
Granulated Sugar - 2 parts

I took 1/2 tbsp sugar and 1/4 tbsp olive oil for scrubbing face and neck. Take more quantity if required.

Read more ...

Broccoli Paratha Recipe - How To Make Broccoli Paratha

Broccoli Paratha Recipe - How To Make Broccoli Paratha:

Broccoli Paratha is the easiest and tastiest way of adding more broccoli in your diet. Broccoli paratha is a great time saving dish since you do not need to make any side dish for it. Since we are using broccoli to stuff the paratha, it is so healthy. Even though Broccoli vegetable is costly, it is recommended to include broccoli dishes atleast once a week. Broccoli reduces the risk of cancer. Broccoli in Tamil - Pachchai Pookosu. Just plain curd can be a great accompaniment for broccoli paratha. You do not need to prepare any side dish. You do not need to worry even if you do not have curd at home. Broccoli paratha tastes well even without curd.

Broccoli Paratha Recipe - How To Make Broccoli Paratha:


Broccoli dishes
Broccoli Paratha


Broccoli Paratha Recipe - How To Make Broccoli Paratha:


Broccoli Paratha Recipe

Prep Time: 30 mins    |  Cook time: 30 Mins    |  Makes: 8 - 10
Easy Broccoli Paratha Recipe 

Ingredients:


To Make the Dough:
  • Wheat Flour - 800g
  • Salt - As required
  • Water - As required
  • Oil - 1 tsp 
To Stuff:
  • Broccoli - 1 small size
  • Onion - 1 finely chopped
  • Ginger Garlic Paste - 1 tsp
  • Cumin seeds/Jeera - 1 tsp
  • Turmeric Powder - A pinch
  • Red Chilli powder - 1 tsp
  • Garam Masala Powder - 1/2 tsp
  • Oil - 2 tsp
  • Salt - As required
  • Coriander Leaves - 1 tbsp
  • Water - To Sprinkle
Other Ingredients:
  • Wheat Flour - for rolling
  • Oil- for cooking


Read more ...

Turmeric Pepper Milk - Home Remedies For Severe Throat Pain, Sore Throat, Ear Pain, Cold and Cough

Home Remedies For Severe Throat Pain, Sore Throat, Ear Pain, Cold and Cough:

It will be really painful when we suffer from common cold and cough. Sometimes we will have even severe throat pain and ear pain due to cold. If we take steps to treat the common cold in the initial stage itself, it will be easy to cure it. Honey and Cinnamon will be able to help you to get rid of cold easily if we take in the initial stage itself. Otherwise, the cold will get worsened and it will also lead to congestion. We will also get headache due to accumulation of cold in our head. On those days, we will not be able to do any work or concentrate on other activities since we will feel very tired. If my cold gets severed and I get all these discomforts in the same time:-( So, I try to treat it early. 


Try to treat the cold in the initial stage itself. If we miss it, we need  to look for other ways to make us feel comfortable during the terrible cold. What I do is, I have Pepper and Palm Sugar Milk(Milagu Panakarkandu Pal | Pepper - Milagu and Palm Sugar - Panakarkandu in Tamil). It will be really soothing during cold. I feel so comfortable while having it. It soothes throat, ear and head immediately. Continue having it at least 2 or 3 times to get relief from cold and cough.


Pepper and Palm Sugar Milk - Home remedy for throat pain, ear pain, cold and cough:


Home remedies for sore throat,ear pain, throat pain, cold and cough
Pepper and Palm Sugar Milk


Pepper and Palm Sugar Milk - Home remedy for throat pain, ear pain, cold and cough:


Ingredients:


Pepper(Milagu in Tamil) - 1 tsp
Palm Sugar(Panakrkandu in Tamil) - 1 tsp
Turmeric - A pinch(optional)
Milk - 1 cup


Read more ...

Til Chutney | Ellu Thogayal | Sesame seeds Chutney Recipe | Ellu Chutney Without coconut

Til Chutney | Ellu Thogayal | Sesame seeds Chutney Recipe | Ellu Chutney Without coconut:

Til chutney is the best accompaniment for Urad dal rice. It can also go well Idli, Dosa and curd rice. I can just have plain rice, curd and til chutney anytime. Til chutney is so tasty even without coconut. It can also be prepared very easily. It does not even take 5 minutes to prepare Til chutney. No need to temper too. Just dry roasting sesame seeds and red chillies are enough. Ellu chutney will be very crunchy too. 

Til Chutney | Ellu Thogayal | Sesame seeds Chutney Recipe Without coconut:


Til Chutney | Ellu Thogayal | Ellu Chutney | Sesame seeds Chutney Recipe Without coconut:


Ellu recipes - Til Chutney | Ellu Thogayal | Ellu Chutney

Prep Time: 3 mins    |   Serves: 3
Recipe Category : Side dish for idli, dosa and rice


Ingredients:

  • Sesame seeds - 75 g
  • Red chillies - 2 or 3
  • Tamarind - A peanut size
  • Salt - As required


Read more ...

Urad Dal Recipes - Split Black Urad Dal rice | Ulutham Paruppu Sadham

Urad Dal Recipes - Split Black Urad Dal rice | Ulutham Paruppu Sadham:


'Ulutham Paruppu or Uluntham paruppu'  are the names to call Urad dal in Tamil. Urad dal is a very healthy pulse widely used in India. Ulutham paruppu sadham is a very famous Tirunelveli recipe. Urad dal should be added for kids and teenage girls exclusively. My mom prepares ulutham paruppu sadham in a very tasty way with palm jaggery and coconut. This rice would be there once a week without fail for healthy reason. It is a very good source of protein. Urad dal helps to strengthen the bones. Urad dal rice is given for young girls to avoid back bone/back pain problems later. My top favorite variety rice is Ulutham paruppu sadham. My mom mixes ellu chutney(sesame chutney), a tsp of gingelly oil, papad with this sadham. It tastes heavenly. Also, it is quite easy to prepare. Check the instructions and you will be able to judge. No side dish is needed. If you want to prepare any vegetable, aviyal is the best accompaniment for this.

Urad Dal Recipes - Split Black Urad Dal rice | Ulutham Paruppu Sadham:


Urad Dal Recipes - Split Black Urad Dal rice | Ulutham Paruppu Sadham:


Urad dal Recipes - Uluthamparuppu sadham | Urad dal rice

Prep Time: 15 mins    |  Cook time: 20  Mins    |  Serves: 4
Recipe Category : Lunch|Main course


Ingredients:

  • Rice - 300g
  • Black split Urad dal - 75g
  • Cumin seeds - 1 tsp
  • Fenugreek seeds - 1 tsp
  • Garlic - 10 cloves
  • Palm Jaggery(Karupatti in Tamil) - 2 tbsp according to your taste
  • Grated coconut - 4 tbsp
  • Salt - As required
  • Water - 1050 ml


Read more ...

Paneer Tawa Masala Recipe - Restaurant Style Spicy Paneer Recipe

Paneer Tawa Masala Recipe - Restaurant Style Spicy Paneer Recipe:


Paneer Tawa Masala is a slightly different variation of Paneer Butter Masala recipe. When we buy Paneer from outside, we have more Paneer at home and we could try different Paneer recipes. I wanted to try a new Paneer recipe instead of making the same Paneer Butter Masala again. The main difference in the taste is just because of Ajwain seeds/Omam added in this Paneer Tawa Masala recipe. Moreover, Paneer Tawa Masala is a very simple and quick to make dish for serving with roti and naan. It tastes great with rice too. My kid also liked this Paneer Tawa Masala.


Paneer Tawa Masala Recipe - Restaurant Style Spicy Paneer Recipe:


Easy Paneer Masala Recipe
Paneer Tawa Masala


Paneer Tawa Masala Recipe - Restaurant Style Spicy Paneer Recipe:


Restaurant Style Paneer Tawa Masala  Recipe

Prep Time: 15 mins    |  Cook time: 20 Mins    |  Serves: 2-3
Recipe Category : Side dish for roti, naan and rice| Recipe Cuisine : Punjabi


Ingredients:

  • Paneer Cubes - 10
  • Big Onion - 1.5
  • Tomato - 3  big size
  • Ginger Garlic Paste - 1 tsp
  • Ajwain seeds/Omam - 1/4 tsp
  • Cumin seeds- 1/4 tsp
  • Dhaniya powder/Coriander powder - 1/2 tsp
  • Salt - As required
  • Garam Masala Powder - 1/2 tsp
  • Oil - 4 tbsp
  • Milk or Fresh Cream - 2 tbsp
  • Coriander Leaves - To garnish
To Marinate the Paneer:
  • Kasuri Methi - 2 tsp
  • Red Chilli Powder - 1 tsp
  • Turmeric Powder - A pinch
  • Chat Masala - 1 tsp
  • Salt - As required


Instructions:


1. Marinate the Paneer with Kasuri Methi, Red chilli powder, turmeric powder, chat masala and salt evenly. Make sure that the Paneer cubes are marinated well with the spices. Keep it aside for at least for 45 minutes to one hour.


2. Chop onions finely and take tomato puree from the tomatoes and keep aside.

3. Heat 2 tbsp of oil in a pan and shallow fry the Paneer cubes marinated with the spices. Keep it aside.


4. Heat 2 tbsp of oil in the same pan and add the cumin and ajwain seeds. Allow them to crackle.

5. Add the chopped onions and ginger garlic paste. Saute them well till the onions become translucent.


5. Add tomato puree, coriander powder, salt, garam masala powder now. Allow it to boil till the raw smell of tomato puree goes off. The oil separates and floats on the top of Paneer Tawa Masala by now.


6. Add Paneer cubes and 50 ml water. Mix well and close the pan with a lid. Cook it in simmer till the Paneer cubes blend with the masala well. It will take 3-5 minutes.


7. Add milk or fresh cream now. Give it a quick stir and switch off the stove.


8. Garnish the Paneer Tawa Masala with coriander leaves.


Notes:

1. Do not add ajwain seeds and Kasuri methi in more quantity than mentioned.

2. You can use Kashmiri Red Chilli powder to get a bright red color.

Hope you liked the Paneer Tawa masala Recipe. Try this Paneer Tawa Masala and let me know how it comes.
Read more ...

Homemade Oatmeal Face Mask with Lemon Juice and Baking Soda - Home Remedy for Acne and blemishes

Homemade Oatmeal Face Mask with Lemon Juice and Baking Soda - Home Remedy for Acne and blemishes:


Oatmeal face mask is highly effective in repairing the damaged skin. It contains 18 different amino acids which are known to act as building blocks of body,  rebuilding the tissue and also helps in promoting healing. When you apply this homemade oatmeal face mask, the skin absorbs these amino acids from the oatmeal face mask. Hence, several skin problems like acne, blemishes are healed. This oatmeal homemade face mask also cleanses, softens, exfoliates and soothes the skin. If you have any kind of itchiness or irritations, this oatmeal face mask is sure to heal those skin problems. This oatmeal face mask is very effective for oily skin.


Homemade Oatmeal Face Mask with Lemon Juice and Baking Soda - Home Remedy for Acne and blemishes:


Homemade Oatmeal Face Mask with Lemon Juice and Baking Soda - Home Remedy for Acne and blemishes
Oatmeal Face Mask


How to make Oatmeal Face Mask at home:


Ingredients:


Oatmeal - 1 tbsp
Lemon juice - 1 tsp
Baking soda - 1/2 tsp
Water - As required

Preparation:


1. Grind the uncooked oats in a mixer/blender/food processor without adding water. Make fine powder of oats.


2. Add 1 tsp lemon juice and 1/2 tsp baking soda to the oats powder.


3. Add water little by little and make a paste to use it as face mask.


4. Clean your face and dry it. Apply the prepared oatmeal face mask  all over the face and neck.

5. Leave it off for 15 minutes. Wash your face. You are done.

You can apply this oatmeal face mask twice a week. Unlike other face masks, this oatmeal face mask is very easy to clean. Make a cup of oatmeal powder and store it in a container, so that you do not need to grind every time.

Read more ...

Honey and Cinnamon for cold and cough - Home Remedy For Cough And Cold

Honey and Cinnamon for cold and cough  - Home Remedy For Cough And Cold:


Today I am going to share an interesting, tasty and yummy home remedy for cold and cough. I have read somewhere that usually kids might get cold 10 times a year. Cold and cough makes kids and adults more tired. I found an effective home remedy which is actually working. Yes, I make honey and cinnamon mixture to treat cold and cough for my kid. Even I have the same to treat my cold. This home remedy is so simple and easy. Give it to your kid thrice a day for 3 days starting from the first day of cold. Your kid will quickly recover from cold. Otherwise, it takes around 1 week to recover from cold. Relying on home remedies for cold and cough is 1000 times better than running behind an antibiotic, right? I started to give honey to my kid after one year only since it is not advisable to give honey to babies under one year. There is a risk of botulism. Okay. Now, let us see how to make honey and cinnamon mixture for treating cold and cough. Honey and Cinnamon is a good home remedy for sinus too.


Honey and Cinnamon - Home Remedy For Cough And Cold:


Honey and Cinnamon - Home Remedy For Cough And Cold:


Ingredients:


1. Honey - 1 tsp for kids | 1 tbsp for adults

2. Cinnamon stick - 1 inch or cinnamon powder - 1/4 tsp

3. Water - 3 tbsp


Read more ...

How To Make Ice Cream Without Ice Cream Maker And Cream - Homemade Ice cream

How To Make Ice Cream Without Ice Cream Maker And Cream - Homemade Ice cream:


Actually, I had a plan to make ice cream without ice cream maker. I tried twice with ice cream mixes from two different brands available in the market. I do not remember the brand names since they were not so popular. Both of the times, I was ended up being a sole eater. My hubby did not like it. I threw up half of the ice cream since I was not able to eat alone even after 3 days. My mom told me that ice cream made with custard powder is coming up great. I decided to try it. Most of the recipes were asking to mix cream. I agree that adding fresh cream makes the ice cream tastier. But, I was not able to find small pack of fresh cream and I did not want to buy large pack. So, I decided to try it without cream like my mom tried. Finally, the ice cream came up with a great taste and I had to fight to take pictures. When I took pictures 3/4th of the ice cream got emptied and started melting out. But, I managed to take a picture to post this recipe since it will be really useful for the moms who want to prepare ice cream for their kids without ice cream maker and cream. No cream means less budget, right?

I have posted banana nutella ice cream too. 


How To Make Ice Cream Without Ice Cream Maker And Cream - Homemade Vanilla Ice cream:


How To Make Ice Cream Without Ice Cream Maker And Cream - Homemade Ice cream
Vanilla Ice Cream


How To Make Ice Cream Without Ice Cream Maker And Cream - Homemade Vanilla Ice cream:


Homemade Vanilla Ice cream Recipe - How To Make Ice Cream Without Ice Cream Maker And Cream

Prep Time: 15 mins    |  Cook time: 30 Mins    |  Makes: 500 ml ice cream
Recipe Category : Dessert

Ingredients:

  • Vanilla Custard powder - 2 tbsp
  • Milk - 500ml
  • Sugar - 5 tbsp


Read more ...

Paneer Wrap Recipe - Paneer Veg Recipe for Kids

Paneer Wrap Recipe - Paneer Veg Recipe for Kids:

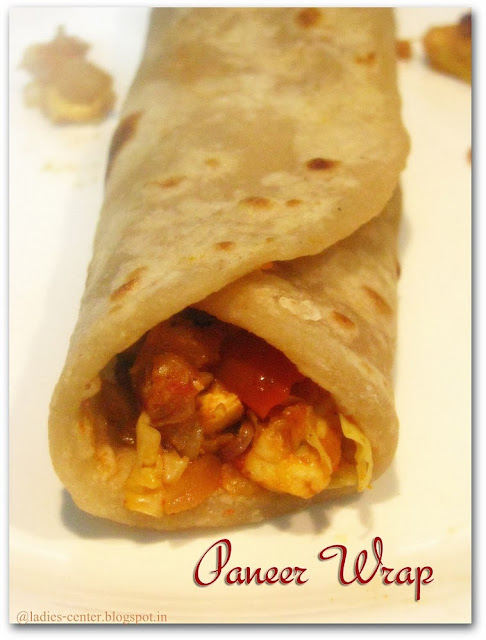
Paaeer wrap recipe is the one which was suggested by my hubby to try it at home. It came perfectly with less effort. It definitely serves as a great lunchbox recipe for kids. Even you can serve it as evening snacks for them. They will like it. I inspired by the Marry brown Paneer wrap taste and wanted to try it at home followed by Veg burger. I have already posted veg burger recipe. Usually Paneer wraps tastes great with tortillas but if you are doing paneer wrap or any kind of wraps frequently, prepare with wheat flour. I have already posted tortilla recipe and phulka/roti recipe also. Check out how to make Paneer wrap at home here and make your dinner memorable one.

Paneer Wrap Recipe - Paneer Recipe for Kids:


Paneer veg recipes
Paneer Wrap


Paneer Wrap Recipe - Paneer Recipe for Kids:


Paneer Wraps Recipe

Prep Time: 10 mins    |  Cook time: 8 Mins    |  Makes: 6 Paneer Wraps
Recipe Category : Main Course

Ingredients:

  • Tortillas(Preferable)/Soft Phulkas- 6
  • Paneer - 10 cubes
  • Butter - 1/2 tbsp(optional)
  • Carrot - 1 no grated(optional)
  • Cabbage - 75 g grated
  • Big onion - 1 finely chopped
  • Tomato - 1 finely chopped
  • Ginger Garlic Paste - 1/4 tsp
  • Red chilli powder - 1/2 tsp
  • Turmeric powder - 1/8 tsp
  • Coriander powder - 1/4 tsp
  • Garam Masala powder - 1/8 tsp
  • Oil - 2 tsp
  • Tomato sauce to spread on tortillas

Read more ...

Homemade Tortillas Recipe - How To Make Tortilla At Home

Homemade Tortillas Recipe - How To Make Tortilla At Home:

Tortillas is nothing but roti made out of maida. Tortillas are mostly made with olive oil. Tortillas are widely used in making wraps such as paneer wraps. Recently I made Paneer wraps and hence I made tortilla also. It is good to avoid maida/plain flour generally. But, it is not that bad if you do it occasionally. You can follow the same recipe and make whole wheat tortillas too. But wraps with plain flour tortilla tastes great. So, do it once in a while to get a restaurant taste that can please your palate. But make the wraps with the whole wheat tortillas as a routine since it is the healthiest option which can be a great lunchbox and kids recipe also. Okay. Now let us see how to make tortillas at home. Usually tortillas made with maida completely. But I have used little wheat flour also. It is your choice to mix wheat flour or to have maida fully to make tortilla.

Homemade Tortillas Recipe - How To Make Tortilla At Home:


How to make tortilla at home
Tortillas


Homemade Tortillas Recipe:


Homemade Tortilla Recipe - How To Make Tortilla at home

Prep Time: 15 mins    |  Cook time: 15 Mins    |  Makes: 8 tortillas
Recipe Category : Main Course

Ingredients:

  • Maida/All purpose flour - 300g
  • Wheat flour - 100g
  • Olive oil - 3 tbsp
  • Salt - As required
  • Baking soda - 1/4 tsp
  • Warm Water - As required


Read more ...

Eggless Mayonnaise Recipe - How to make Vegetarian Mayonnaise Without Eggs

Eggless Mayonnaise Recipe - How to make Vegetarian Mayonnaise Without Eggs:


Eggless Mayonnaise recipe - Learn how to make eggless vegetarian mayonnaise without eggs. It turns out to be very creamy and tasty which you can use it as a spread for breads and buns.

Eggless Mayonnaise recipe is what I wanted to try long time back to dress up the sandwiches. But I tried only when I decided to try Veg burger yesterday. This vegetarian eggless mayonnaise recipe without eggs came out very well. I never thought that this vegetarian mayonnaise would turn out so tasty and super creamy.

There are lot of eggless mayonnaise cans from various brands available in the market. But homemade eggless mayonnaise recipe is the best in terms of hygiene and safety as we do not add any preservatives. It is a great dresser for sandwich and burgers. You can even have mayonnaise as a dip to have apple slices, bread sticks or cucumber slices. You can prepare this eggless mayonnaise and keep it in refrigerator. I have heard that you can store eggless mayonnaise in fridge for a month. But I would recommend you to prepare in less quantity and consume it in 3 days since the recipe is very quick and easy one. Let us see the eggless mayonnaise recipe |  vegetarian mayonnaise recipe without eggs now.

Eggless Mayonnaise Recipe - How to make Vegetarian Mayonnaise Without Eggs:


Homemade Eggless Mayonnaise Recipe - How to make Eggless Mayonnaise at home

Prep Time: 2 mins    |  Cook time: Less than 10 Mins    |  Makes: 125g
Recipe Category : Spread for burger and sandwich

 Eggless Mayonnaise Recipe - Ingredients:

  • Milk - 125ml
  • Maida/Refined Flour - 1 tbsp
  • Salt - 1/2 tsp
  • Sugar - 1/2 tsp
  • Butter - 3/4 tbsp
  • Vinegar - 1.5 tbsp
  • Black Pepper powder - 1/8 tsp
  • Mustard powder -1/4 tsp


Read more ...

Top 15 Chutney Recipes for Idli and Dosa - Easy Chutney recipes

Top 15 Chutney Recipes for Idli and Dosa - Easy Chutney recipes:


I have compiled the list of different chutney recipes here. The below chutney recipes list will be updated as soon as I post new chutney recipes in the blog. The chutney recipes will definitely help you to say no to boring breakfast and dinners. Try different chutney recipes every day in a week and you will not feel bad to have idli and dosas repeatedly. Check out this space for more chutney recipes which can be a great accompaniment for idli, dosa, pongal and even rice too.


Read more ...

Easy Fried Coconut Chutney for Idli and Dosa - Travel and Lunchbox Recipes

Easy Fried Coconut Chutney for Idli and Dosa - Travel and Lunchbox Recipes:


Do you know how to prepare a travel friendly chutney? If not, it is time to learn the recipe of fried coconut chutney. This fried coconut chutney will not spoil around 8 hours without refrigeration. Sounds good, right? The another travel friendly recipe I like is, chapathi and tomato onion or tomato side dish. But, making chapathi is time consuming especially when we are in hurry. So, this fried coconut chutney is a perfect pick for travel. We call it as travel chutney. I not only prepare it for travelling, I prepare it to take a break from routine chutney recipes. My whole family loves the taste of fried coconut chutney. Ok. Let us see the recipe of fried coconut chutney now. You can even pack this chutney for lunchbox also as a side dish for idli or dosa. It is a great accompaniment for Idli and Dosa. It tastes good with curd rice too.

Read more ...

Tomato Onion Red Chutney Recipe for Idli and Dosa - Tomato Chutney Without Coconut

Tomato Onion Red Chutney Recipe for Idli and Dosa - Tomato Chutney Without Coconut:


My family gets easily bored to have Idli continuously. But Idli is a great time saver except the cleaning part. I was able to continuously serve Idli for three days this week successfully. Thanks to different kind of chutneys I have prepared. My hubby and kid loved it. They both liked the chutney and they did not mind to have Idli continuously. So, prepare different kind of chutneys to survive with Idlis as I did. You will not regret to have Idlis. Usually I prepare Idlis and chutney for dinner in more quantity and keep the remaining Idlis for my next day's breakfast. But when I prepared this tomato onion red chutney for the dinner, we finished up in the dinner itself. I was literally having it without idlis. It tasted that great. The best part of Tomato Onion Red Chutney Recipe Without Coconut is we are preparing without coconut. So, it is great chutney for people  who wants to control their bad cholesterol. No grating time is required. Try this Tomato Onion Red Chutney Recipe Without Coconut today itself and enjoy.

Read more ...

Veg Spicy Masala Sandwich Recipe - How To Make Veg Sandwich

Veg Spicy Masala Sandwich Recipe - How To Make Veg Sandwich:


There are lot of ways you can make veg sandwich. I tried different kind of sandwich recipes and this is the first sandwich recipe I am going to post it here. Of course, this is my most favorite sandwich recipe. I am a fan of tomato sauce. Since this veg sandwich recipe is coated with tomato sauce inside, you will like it very much if you are also a fan of tomato sauce. My hubby is not a fan of tomato sauce. He mostly avoids it. But he also like this veg sandwich recipe. My kid also enjoyed it. Let us move on to know how to make veg sandwich. Try this awesome veg sandwich for your dinner. It saves your time and makes your dinner a delicious one. Also, veg sandwich is a very good lunch box recipe.


Read more ...

Paruppu Podi Recipe - How to make Paruppu podi at home

Paruppu Podi Recipe - How to make Paruppu podi at home:


Paruppu podi is a great and tasty accompaniment for plain rice. I tasted it for the first time in 2007 when I was staying in a hostel while working. I remember one of my ever green friends used to bring this to the dining table every time we had rice during weekends. I fondly call her as Sangeetha akka. She is really a nice human being. She is so soft and caring too. She was so kind enough to share paruppu podi with all of us. Even though we had nice kulambu for rice, we usually started the lunch with the it. After that the caterers in my office cafeteria started having it in their daily menu. Paruppu podi tastes yummy and tasty with ghee or gingelly oil while having with hot rice. My mom used to make Paruppu podi at home and she used to give me after marriage. Nowadays I am good enough on making paruppu podi at home on my own:-)

Paruppu podi is a guilt free recipe especially when you are cooking for 2 or for you and your baby. Most of the days, I make fresh toor dal for my little one and I have it. It is so healthy since it is made out of toor dal and also it saves lot of time. So, try this recipe at your home and have a healthy side dish for rice in no time.

Paruppu podi Recipe - Spiced Lentil Powder:


Spiced Lentils Powder


Paruppu podi Recipe - Spiced Lentil Powder:


Paruppu Podi Recipe - Spiced Lentil Powder recipe


Prep Time: 10 mins    | Makes: 250g
Recipe Category : Side dish for rice
Easy paruppu podi recipe

Ingredients:

  • Toor Dal/Thuvaram paruppu  - 250g
  • Dry Red Chillies - 2 
  • Cumin seeds - 1 tsp
  • Curry Leaves - few
  • Whole Black Pepper - 1 tsp
  • Garlic - 2 flakes
  • Hing - A pinch
  • Salt - As required
  • Oil - 1 tsp


Read more ...

Idli Manchurian Recipe - Fried Idli Recipe - Leftover Idli Recipes

Idli Manchurian Recipe - Fried Idli Recipe - Leftover Idli Recipes:


Chill idli/Idli Manchurian/Kaima idli is the best recipe which can be made from idlis. I made this chilli idli/idli Manchurian 3 days before and I asked my hubby to guess what the dish is. He was really confused and he did not even able to think below Paneer. He wondered once I told him that it was Idli manchurian made out of left over idlis. There were four idlis remaining the day before. I kept it in fridge. I did not like to have it even in the next morning since I am not a big fan of Idli. In the evening, I thought of doing something with Idli. When I searched for a Fried chilli idli/Idli Manchurian recipe, I was happy to see that frozen idli has to be used to make it. Idli Manchurian came out very well. It was so crunchy and juicy. Of course, it should be eaten hot and you cannot resist yourself from having immediately.


Idli Manchurian Recipe - Chilli Idli - Fried Idli Recipe:


Fried Idli recipe
Idli Manchurian

Idli Manchurian Recipe - Chilli Idli - Fried Idli Recipe:


Idli Manchurian | Fried Idli | Chilli Idli Recipe


Prep Time: 30 mins    | Serves: 2
Recipe Category : Snacks, Breakfast or Dinner
Easy recipe with leftover idlis

Ingredients:

  • Leftover frozen idlis - 4
  • Onion - 1 Big size finely chopped
  • Tomato - 2 medium size
  • Capsicum - 1/2 finely chopped
  • Ginger Garlic Paste - 3/4 tsp
  • Cumin seeds - 1 tsp
  • Curry Leaves - few
  • Tomato sauce - 1 tbsp
  • Salt - As required
  • Oil - As required

  • Powders

  • Red Chilli Powder - 1 tsp
  • Dhania Powder/Coriander powder - 1 tsp
  • Garam Masala powder - 1 tsp

  • To Garnish

  • Coriander Leaves - for garnishing


Read more ...

Instant Wheat Dosa Recipe - Godhuma Dosa Recipe

Instant Wheat Dosa Recipe  - Godhuma Dosa Recipe:

Here comes another recipe which is quite helpful when I have no time. When I was having my MBA exams, I and my friend studied together. She used to prepare Wheat Dosa/Godhuma Dosa for almost all dinners. Before that, I was not a fan of wheat dosa. I thought Noodles was only the quick dinner I could make. After eating wheat dosa for many days, I slowly started loving wheat dosa. Apart from being a quick recipe, wheat dosa(Godhuma Dosai in Tamil) is a healthy one too. Only  getting the right consistency of the wheat dosa batter is the difficult part. It will get easy once you try it frequently. Coconut chutney, onion chutney, red chilli chutney and tomato onion chutney are great accompaniments for wheat dosa. The recipe here tells you how to prepare crispy and healthy wheat dosas.

Instant Wheat Dosa Recipe  - Godhuma Dosa Recipe:


Instant Wheat Dosa Recipe  - Godhuma Dosa Recipe:


Wheat Dosa  | Godhuma Dosa

Prep Time: 10 mins    | Makes : 10
Recipe Category : Breakfast and Dinner
Quick and Easy wheat dosa recipe for breakfast and dinner

Ingredients:

  • Wheat Flour - 100g
  • Rice Flour - 100g(or another 100g wheat flour. Add Rice flour for crispiness and better taste)
  • Salt - To Taste
  • Black pepper  - 1 tsp(optional)
  • Cumin seeds - 2 tsp crushed
  • Water - 400ml

  • To Temper

  • Oil - 1 tsp
  • Mustard seeds - 1 tsp
  • Urad dal - 1/2 tsp
  • Green Chilli - 2 nos
  • Curry Leaves - Few
  • Hing - A pinch

Read more ...

How To Make Cold Coffee at home | Cold Coffee Recipe

How To Make Cold Coffee at home | Cold Coffee Recipe:


Cold coffee is a very easy beverage you can make at home and chill yourself. My hubby bought Amul Kool Cafe last week and I had it. I loved it very much. I used to have cold coffee when we go to malls or coffee shops. I tried to make cold coffee this time and it came out very well. If I get a nap in the day time, I feel very lazy to heat milk and then making coffee. Instead of that, cold bournvita or cold coffee are my evening favorites. Try this cold coffee at home. More importantly, do not add water to the milk while boiling since you will be adding ice cubes while making cold coffee.


How To Make Cold Coffee at home | Cold Coffee Recipe:


How To Make Cold Coffee
Cold Coffee


How To Make Cold Coffee at home | Cold Coffee Recipe:


Cold Coffee Recipe


Prep Time: 5 mins    | Serves: 1
Recipe Category : Beverages
Cold Coffee | Iced Coffee Recipe

Ingredients:

  • Boiled and chilled Milk - 1 cup
  • Instant coffee powder - 1.5 tsp
  • Sugar - To Taste
  • Crushed Ice cubes - As required(I used 3 cubes)
  • Vanilla icecream or Chocolate ice cream - 1 scoop(optional)


Read more ...

Parachute Advansed Ayurvedic Hair Oil Review

Parachute Advansed Ayurvedic Hair Oil Review:


I have finished up 3 Parachute Advansed Ayurvedic Hair oil and ready with the review. I really wanted to post my review on Parachute Advansed Ayurvedic Hair Oil once I finished up the second bottle itself. But, I wanted to try one more to post my review. No one recommended this product to me. I bought it myself to try it. I was using Amway Persona Amla Hair oil before that. Let us see the Parachute Advanced Ayurvedic Hair Oil product information and my review here.

Parachute Ayurvedic Hair Oil Review:


Parachute Advansed Ayurvedic Hair Oil Review
Parachute Advansed Ayurvedic Hair Oil


Parachute Advansed Ayurvedic Hair Oil Review:


Product Information - Parachute Advansed Ayurvedic Hair Oil:

Price : Rs. 83 for 190 ml

Shelf Life : 3 years

Ingredients:


Amla, Ghritakumari, Methi, Mehendi,  Nagarmotha, Coconut oil/Excipients , Sugandhit Dravya.

See the below picture for composition of the ingredients.


Parachute Advansed Ayurvedic Hair Oil Ingredients

What they claim:

Parachute Advansed Ayurvedic Hair Oil nourishes the hair roots and scalp and controls hair fall effectively. It gives us long, thick and beautiful hair.  It also promotes hair growth,  reduces dandruff and prevents premature greying. Parachute Advansed Ayurvedic Hair Oil makes us hair to stay truly healthy.


Parachute Advansed Ayurvedic Hair Oil Review:


I started using it in my native and it really suited my hair well. But I dropped it just because the fragrance was not comfortable for me. But after using it for a couple of months, I am used to this fragrance and I feel comfortable now.

Once I shifted to our new home here, I had a severe hair fall due the hard water here. I was using Amway Persona Amla Hair oil and it did not effectively reduce my hair fall. The hair fall was so severe. Then I thought of trying Parachute Advansed Ayurvedic Hair Oil again. When I used it in my native, it made my hair so silky and easy for detangling.  So, I thought of using it again. My hair is a dry one and Parachute Advansed Ayurvedic Hair Oil helps me to reduce the dryness. I am able to detangle my hair easily nowadays.

I can also see visible hair growth and my hair fall is totally under control. My heart was breaking to see the bunch of hairs going off while combing before I used this oil. Now I am happy to see less hair fall. My hair also has grown well.

The fragrance will not easily attract you. Some will even hate it. But some will like it to the core. You can easily tell that it is an ayurvedic product by its fragrance itself. The color of the Parachute Advansed Ayurvedic Hair Oil is golden brown color slightly.


I do not have dandruff. So I am not able to tell you how effective it is for dandruff.

Pros:


1. Price is low.
2. Full of Ayurvedic ingredients with Coconut oil/excipients.
3. Recommended by Ayurvedic Vaidya Pharmacy, Coimbatore.
4. Widely available at least in Tamil Nadu.
5. Effectively reduces hair fall.
6. Visible hair growth.
7. Great oil for dry hair.

Cons:


1. The fragrance of Parachute Ayurvedic hair oil may not impress everyone.

Read more ...